

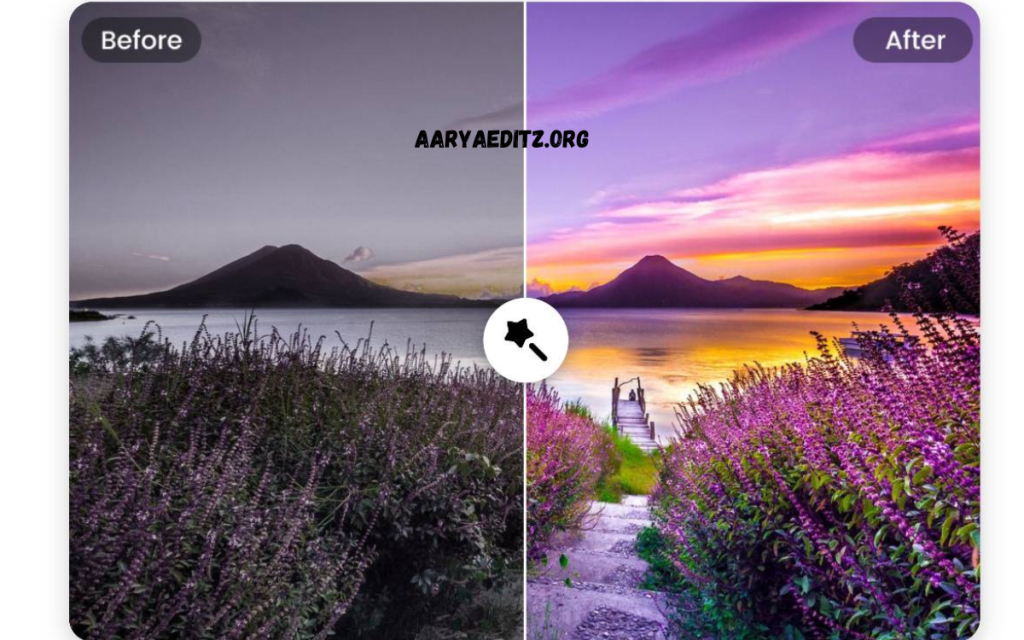
The Brown & Aqua Tone Lightroom Preset is designed to give your photos a stylish and balanced aesthetic by blending warm earthy browns with refreshing aqua hues. This preset creates a harmonious contrast between vintage-inspired warmth and modern vibrancy, making it ideal for those looking to elevate their images with a unique color palette. Whether you’re a photographer, influencer, or content creator, the Brown & Aqua Tone Lightroom Preset offers a fast and effective solution for achieving visually stunning results without the need for complicated edits.
When applied, the brown tones in the preset add depth and warmth to your photos, evoking a timeless and cozy feel, while the aqua shades provide a soothing coolness that contrasts beautifully with the earthier colors. The combination of these two elements creates a dynamic yet balanced look that enhances the overall mood of your images. With just a click, you can transform your photos, making them more visually captivating and ready for sharing across social media platforms or in professional portfolios.
This preset is a powerful tool for those who want to streamline their editing process while still achieving high-quality, professional-looking results. The simplicity of using the preset makes it perfect for both beginners and seasoned photographers who want to save time on editing while still producing visually impressive content. By integrating this preset into your workflow, you can quickly and effortlessly add a unique tone to your images, whether you’re capturing portraits, landscapes, or lifestyle shots. The versatility of the Brown & Aqua Tone Lightroom Preset ensures that it complements a wide range of photography styles, helping you create images that stand out in any setting.
For photographers and content creators looking to make a lasting impact with their photos, this preset offers a perfect balance of vintage warmth and modern coolness. It’s a great option for those who appreciate a more refined, artistic look and want to infuse their work with an aesthetic that feels both timeless and fresh.
By adopting the Brown & Aqua Tone Lightroom Preset into your editing process, you can streamline your creative workflow and elevate your photography game with ease.
What is the Brown & Aqua Tone Preset?
The Brown & Aqua Tone Lightroom Preset is a photo-editing tool designed to elevate your images by blending rich, warm brown tones with cool aqua hues. This preset provides a unique visual style that combines earthy, warm tones with refreshing blues or greens, creating a dynamic and eye-catching effect. Perfect for photographers, influencers, and content creators, the preset offers a seamless way to transform your photos into polished, cinematic masterpieces with minimal effort. Whether you’re capturing portraits, landscapes, or lifestyle shots, the Brown & Aqua Tone Preset provides a versatile and professional touch to your images.
With this preset, you can quickly achieve a visually striking look without having to manually adjust each individual photo setting. The brown tones infuse your photos with a cozy, vintage-inspired warmth, while the aqua hues add a modern vibrancy that balances the composition. The result is a harmonious blend that enhances both the colors and mood of your images, making them stand out in any portfolio or on social media. For those looking to streamline their editing process while still achieving stunning results, this preset is an invaluable tool.
How to Use the Brown & Aqua Tone Preset
To begin using the Brown & Aqua Tone Preset, download the preset and import it into Adobe Lightroom. Start by going to the ‘Develop’ module, click on the ‘Presets’ panel, and select the ‘Import’ option. Once imported, you’ll find the preset under the ‘User Presets’ section. Simply click on the preset to apply it, and your image will be instantly transformed with its signature brown and aqua tones.
While the preset automatically adjusts the photo, you can fine-tune additional settings, such as exposure, contrast, or other adjustments, based on your specific image and preferences. Once you’re happy with the results, you can easily export your image in the format that suits your needs.
Benefits of the Brown & Aqua Tone Preset
The Brown & Aqua Tone Preset offers several key benefits that make it a must-have tool for photographers and content creators alike:
- Time-Saving: This preset offers a one-click solution to enhance your photos, saving you valuable editing time.
- Consistency: Maintain a consistent style across your images, which is perfect for creating a cohesive aesthetic on social media platforms or within portfolios.
- Enhanced Visual Appeal: By blending warm and cool tones, this preset makes your images more visually striking, offering a cinematic effect that enhances their overall appeal.
- Suitable for Various Themes: Whether you’re shooting travel, landscapes, portraits, or lifestyle photography, the Brown & Aqua Tone Preset adapts to a wide range of photo types.
Features of the Brown & Aqua Tone Preset
The Brown & Aqua Tone Preset is packed with features that make it highly customizable and easy to use:
- Customizable Tones: The preset’s blend of brown and aqua tones can be adjusted to match your specific style and the mood you want to convey in your photos.
- Compatible with Lightroom: Seamlessly integrates with Adobe Lightroom, allowing for smooth incorporation into your existing editing workflow.
- Versatile: Ideal for a wide range of photography genres, including urban cityscapes, natural landscapes, and beach photography.
- High-Quality Finish: Transforms your images to achieve a professionally edited look, giving your photos a polished, aesthetically pleasing finish.
- Easy to Use: With minimal effort, even beginners can achieve a high-end, cinematic result, making this preset perfect for photographers of all skill levels.
The Brown & Aqua Tone Lightroom Preset is a powerful tool that enhances both the color and mood of your images. It is ideal for anyone looking to create a cohesive, stylish, and professional aesthetic in their photography, making it a valuable addition to any photographer’s toolkit. Whether you’re editing personal photos or professional work, this preset ensures that your images stand out with a unique and dynamic look.
How to edit in Lightroom Brown & Aqua Tone Preset
Editing with the Brown & Aqua Tone Preset in Lightroom is a straightforward and effective way to enhance your images, creating a cohesive and visually striking aesthetic. This preset brings a harmonious blend of warm brown tones and cool aqua hues to your photos, adding both vibrancy and a cinematic touch. Whether you’re a professional photographer or a hobbyist, the Brown & Aqua Tone Preset offers a quick way to elevate your images, giving them a unique yet balanced visual style.
By following these steps, you can apply the preset with ease and fine-tune your photos for the best results. This simple process will save you time while helping you achieve a polished and professional look for your images.
Import Your Image into Lightroom
To get started, open Adobe Lightroom and import the photo you want to edit. Click on the “Import” button to select your image from your file system and import it into Lightroom. This is the first step in applying the Brown & Aqua Tone Preset to your photo.
Import the Brown & Aqua Tone Preset
If you haven’t already added the Brown & Aqua Tone Preset to Lightroom, you can easily import it. In the top-right corner, click on the “Develop” module. On the left-hand panel, navigate to the “Presets” section. Click on the “+” sign at the top of the panel and choose the “Import Presets” option. Locate the Brown & Aqua Tone Preset file on your computer and click “Import” to add it to Lightroom.
Apply the Brown & Aqua Tone Preset
After importing the preset, go back to the Develop module. On the left-hand panel, under the “User Presets” section, you’ll see the Brown & Aqua Tone Preset you imported. Simply click on the preset to apply it to your image. The preset will instantly adjust the colors, blending the warm brown tones with the cool aqua hues to create a stunning effect.
Fine-Tune the Adjustments
While the Brown & Aqua Tone Preset will automatically adjust the colors of your photo, you may want to make additional changes to fine-tune the image:
- Exposure: Adjust the exposure to lighten or darken the photo depending on your needs.
- Contrast: Increase or decrease contrast to emphasize the tones and make the image more dramatic or soft.
- White Balance: Fine-tune the “Temp” (temperature) and “Tint” sliders to correct any color imbalances in terms of warmth or coolness.
- Saturation and Vibrance: Adjust the saturation and vibrance sliders to control the intensity of the brown and aqua tones.
- Tone Curve: Use the tone curve to fine-tune shadows, highlights, and mid-tones for more precise control over your image’s tonal range.
Enhance Specific Areas (Optional)
If you want to further enhance specific areas of your image, consider making targeted adjustments. For example, in a landscape photo, you might apply more saturation to the sky to bring out the aqua tones. Additionally, adjusting shadows or highlights in certain areas can help create a more balanced and visually appealing image.
Sharpen & Reduce Noise (Optional)
To ensure your image has a professional finish, you can sharpen the photo or reduce any noise that might be present. To do this, go to the “Detail” panel in Lightroom and adjust the “Sharpening” and “Noise Reduction” sliders. This will help add clarity and smoothness to your photo, giving it a polished, high-quality look.
Export Your Image
Once you’re satisfied with the edits, it’s time to export your photo. Click on “File” in the top-left corner, then select “Export.” Choose your preferred export settings, such as file format and resolution, and save your edited photo.
Tips for Better Results with Brown & Aqua Tone Preset
- Use the preset on well-lit images: The Brown & Aqua Tone Preset works best on images with good lighting and contrast. If your photo is underexposed or overexposed, adjust the exposure first before applying the preset.
- Experiment with vibrancy: Sometimes, reducing the vibrance slightly can help keep the tones more natural and prevent them from becoming too intense.
- Combine with filters or other effects: For additional creative control, you can combine this preset with other Lightroom effects, such as vignette, split toning, or grain, to further enhance your image.
By following these steps and tips, you can easily edit your photos using the Brown & Aqua Tone Preset in Lightroom, achieving stunning, balanced results with minimal effort. Whether you’re editing portraits, landscapes, or lifestyle shots, this preset provides a quick and effective way to transform your images into captivating, high-quality visuals.
How to Download Brown and Aqua Tone Lightroom Preset
Downloading and using the Brown and Aqua Tone Lightroom Preset is a simple process. Below is a step-by-step guide to help you get started and transform your photos effortlessly:
1. Find a Reliable Source
To download the Brown and Aqua Tone preset, you first need to find a reliable source for it:
- Preset Marketplaces: Websites like Creative Market, Etsy, and Presetpro often offer both paid and free Lightroom presets.
- Free Preset Websites: There are numerous online platforms offering free presets. However, be sure to download from trustworthy sites to avoid potential risks.
- Social Media: Some photographers sell or share presets through platforms like Instagram or their personal websites. Ensure that these creators are reputable.
2. Download the Preset
Once you’ve found the preset, you’ll typically receive a .zip file containing the preset files in formats like .xmp (for Lightroom Classic and Lightroom CC) or .lrtemplate (for older versions of Lightroom).
- Download the file and, if necessary, extract the contents to access the preset files.
3. Import the Preset to Lightroom
After downloading the preset, it’s time to import it into Lightroom. The process differs slightly based on the version you’re using:
Download
For Lightroom Classic (Desktop Version):
- Open Lightroom Classic on your computer.
- Go to the Develop module.
- On the left-hand side, locate the Presets panel.
- Right-click on User Presets (or any other preset folder where you want to add it) and select Import.
- Find the folder where you saved the downloaded preset files, select the .xmp files, and click Import.
For Lightroom CC (Cloud-based Version):
- Open Lightroom CC on your computer or mobile device.
- Click on the Edit icon (the slider symbol).
- At the bottom of the editing panel, click on the Presets tab.
- Scroll down and click the three dots or gear icon, then select Import Presets.
- Locate and import the downloaded preset files.
4. Apply the Preset
Once the preset is imported, it’s time to apply it to your image:
- In Lightroom, select the photo you wish to edit.
- In the Presets panel, click on the Brown and Aqua Tone preset you imported.
- The preset will instantly be applied, adjusting the colors and tones of your image to create a balanced and striking look.
5. Adjust and Fine-Tune (Optional)
After applying the preset, you may want to make further adjustments to perfect the image:
- Exposure: Adjust to lighten or darken the image as needed.
- Contrast: Modify to enhance or soften the difference between light and dark areas.
- Saturation/Vibrance: Fine-tune the intensity of colors to match your style.
- White Balance: Adjust the temperature and tint to correct the overall warmth or coolness of the image.
6. Save Your Edited Photo
Once you’re satisfied with the result, save your edited image:
- Click on File > Export, or use the shortcut Ctrl + Shift + E (Windows) or Cmd + Shift + E (Mac).
- Choose your preferred export settings, such as file format and resolution, and save your photo.
With these simple steps, you’ll be able to download, import, apply, and tweak the Brown and Aqua Tone Lightroom Preset to achieve stunning, professional-looking results in no time! Let me know if you need further clarification on any part of the process.
Frequently Asked Questions
Will the preset work on all lighting conditions?
The Brown & Aqua Tone Preset works best on images with good exposure and contrast. If your photo is too dark or overexposed, it’s recommended to adjust the exposure and other settings before applying the preset to achieve optimal results.
Can I use the Brown & Aqua Tone Preset on any photo?
Yes, this preset is versatile and works well across various photo genres, including landscapes, portraits, travel, urban photography, and lifestyle shots. The unique blend of warm brown and cool aqua tones enhances both natural and urban scenes.
How do I install the Brown & Aqua Tone Preset in Lightroom?
To install the preset, go to the Develop module in Lightroom. Click on the Presets panel, then select Import. Once imported, the preset will appear under User Presets and be ready for use.
Can I use the preset for both RAW and JPEG photos?
Yes, the Brown & Aqua Tone Preset works for both RAW and JPEG files. However, using RAW files is recommended as they offer higher quality and a greater range of editing flexibility.
Can I combine the Brown & Aqua Tone Preset with other presets or effects?
Absolutely! You can layer the Brown & Aqua Tone Preset with other Lightroom presets, effects, or adjustments, such as filters, vignettes, or grain. This allows for even more creative control over your images.
Conclusion
The Brown & Aqua Tone Lightroom Preset is a dynamic and versatile editing tool designed to instantly enhance the visual appeal of your photos. By blending warm, earthy brown tones with refreshing aqua hues, this preset creates a bold contrast that amplifies both the mood and aesthetic of your images. Whether you’re editing landscapes, portraits, or travel photography, it delivers a polished, cohesive look that makes your photos stand out with ease.