

Welcome to our Video Editing Tutorial! Whether you’re a beginner eager to explore the basics or someone looking to enhance your existing skills, this comprehensive guide is designed to help you master video editing. We’ll walk you through everything you need to know, from cutting and trimming clips to adding smooth transitions, eye-catching effects, and immersive sound. By combining these techniques, you’ll be able to produce professional-quality videos that captivate and engage your audience.
Video editing is a dynamic and essential skill that transforms raw footage into compelling stories, enabling you to bring your creative vision to life. With the right tools, techniques, and mindset, you’ll not only enhance the visual and auditory aspects of your videos but also elevate their overall impact. Whether you’re creating content for social media, personal projects, or professional purposes, understanding the nuances of video editing can give you a significant edge.
From trimming unnecessary segments to ensure a polished flow, to seamlessly adding transitions that enhance the viewer’s experience, video editing is all about precision and creativity. Additionally, learning to incorporate effects and soundtracks effectively can take your videos to the next level, adding depth and emotion that resonate with your audience.
This guide is your gateway to unlocking the world of video editing, offering practical tips and insights that cater to all skill levels. Let’s dive in and explore the tools and techniques that will empower you to craft stunning, high-quality videos with ease and confidence.
Understanding the Basics of Video Editing
Before you dive into any video editing software, it’s crucial to familiarize yourself with the fundamental concepts and terminology that form the backbone of video editing. By understanding these basics, you’ll be better equipped to navigate the editing process and create polished, professional-quality videos that effectively convey your story. Here are a few essential terms and ideas you should know:
Timeline: The timeline is the core of any video editing software. It’s where all your video clips, audio tracks, and effects come together to form a cohesive sequence. Think of it as the canvas where you arrange and layer your content to craft your final video. Each element you add, whether it’s a video clip, music track, or transition, is placed on the timeline, allowing you to visualize the flow and structure of your project. Mastering how to organize and edit on the timeline is one of the first steps to successful video editing.
Cutting/Trimming: Cutting and trimming are essential techniques that help you refine your video. Cutting involves removing unnecessary portions of a clip, while trimming adjusts the duration of a clip to fit the flow of your story. This process allows you to focus on the most impactful parts of your footage, ensuring that every second of your video serves a purpose. By effectively cutting and trimming, you can eliminate dead space, improve pacing, and maintain your audience’s engagement throughout the video.
Transitions: Transitions are the visual effects that smooth the shift from one clip to another, making your video flow seamlessly. Common transitions include fades, dissolves, and wipes, each of which serves a different stylistic purpose. For example, a fade can signify the passage of time or provide a soft introduction to a new scene, while a wipe can add a creative, dynamic touch. Choosing the right transitions can greatly enhance the overall aesthetic and storytelling of your video.
Effects: Visual effects are powerful tools that allow you to add creative flair and polish to your video. These can range from basic adjustments like color correction, which enhances the visual consistency of your footage, to more advanced effects like slow motion or time-lapse, which add dramatic emphasis. By learning to use effects strategically, you can elevate the visual impact of your videos, making them more engaging and memorable.
Audio Editing: High-quality audio is just as important as visually appealing footage when it comes to creating professional videos. Audio editing involves fine-tuning soundtracks, adjusting the volume of clips, removing background noise, and adding music or sound effects to enhance the viewer’s experience. For example, a well-placed background score can evoke emotion, while crisp dialogue ensures your message is heard clearly. By balancing and synchronizing audio with your visuals, you create a more immersive and cohesive final product.
Understanding these foundational concepts is the first step toward mastering video editing. Whether you’re cutting clips to create a smooth narrative, adding transitions to enhance flow, or incorporating effects and sound to captivate your audience, these basics provide the building blocks for creating compelling, professional-quality videos.
How Do I Start Learning Video Editing?
Starting your journey in video editing can feel overwhelming, especially with the variety of tools, techniques, and workflows available. However, taking that first step is often the most important part, and there are multiple approaches to help you ease into the process while building your skills at your own pace. Whether you’re a complete beginner or someone looking to refine your skills, video editing offers endless opportunities for growth and creativity. It’s important to remember that video editing is a continuous learning process—there’s always a new technique, workflow, or trick waiting to be discovered. Here are some effective ways to begin learning and mastering video editing:
1. Software Walkthroughs & Tutorials:
Familiarizing yourself with your chosen video editing software is a vital first step. Most professional software, such as Adobe Premiere Pro, Final Cut Pro, or DaVinci Resolve, includes built-in learning resources like tutorials or walkthroughs. These features are designed to guide new users through the software’s interface, tools, and essential functions, offering a hands-on way to learn the basics. Exploring these resources allows you to understand how the software works while building confidence in using its tools effectively. Taking the time to complete these tutorials will create a strong foundation for more advanced editing techniques later on.
2. YouTube Videos:
YouTube is one of the best platforms for learning video editing, offering a wealth of free, high-quality tutorials for every skill level. Beginners can find videos that cover the basics, such as how to cut and trim clips or add transitions, while more advanced users can explore niche tutorials on creating cinematic effects, color grading, or advanced motion graphics. The diversity of content available on YouTube ensures that you’ll find tutorials that match your editing style and goals. Additionally, many of the creators behind these tutorials are professional video editors who share practical tips and tricks, making this platform an invaluable learning resource.
3. Masterclasses:
For those looking to invest in structured learning, platforms like Udemy, Skillshare, or Coursera offer comprehensive masterclasses and accredited courses on video editing. These courses are perfect for creators who want to delve deeper into the craft, covering everything from the fundamentals of editing to advanced techniques like 3D effects, sound design, and storytelling. Paid courses often provide step-by-step guidance, practice projects, and direct feedback from instructors, making them an excellent choice for anyone seeking in-depth and hands-on training. By completing these courses, you can gain not only knowledge but also confidence in your ability to handle complex editing tasks.
4. Learn as You Go:
If you prefer a more hands-on, self-directed approach, consider jumping straight into editing your own videos. This method allows you to learn through experience, discovering new techniques and solving problems as they arise. While this approach may seem less structured, it’s an excellent way to develop your skills organically, as you’ll encounter real-world challenges and find creative solutions in the process. Editing personal projects, such as travel vlogs, short films, or social media content, can be a great starting point for experimenting with different styles and techniques. Over time, each project will build on the skills you’ve learned, helping you grow into a more proficient editor.
No matter which approach you choose, the key to mastering video editing is consistent practice and a willingness to explore new ideas. Every project you work on, whether simple or complex, will teach you something valuable. Remember, video editing is an evolving skill—there’s always room for improvement and innovation. By staying curious and open to learning, you’ll be well on your way to creating stunning, professional-quality videos that bring your creative vision to life.
Choosing the Right Video Editor
Choosing the right video editor is a crucial step in starting your video editing journey. The software you select will have a significant impact on your workflow, creative possibilities, and overall experience, especially when you’re just beginning. With so many options available, it can be overwhelming to decide which one is the best fit. However, by considering a few key factors, you can make an informed decision that aligns with your budget, skill level, and creative goals.
1. Budget
Your budget is one of the most important factors when choosing a video editor. Fortunately, there are video editing tools available for every price range, from completely free software to high-end professional-grade programs. If you’re just starting out, free options like DaVinci Resolve, iMovie, or HitFilm Express can be excellent choices. These programs provide robust features without requiring an upfront investment, making them ideal for beginners exploring the basics.
For those with a budget to invest, paid options like Adobe Premiere Pro, Final Cut Pro, or Sony Vegas Pro offer advanced tools and capabilities. Premium software often includes features such as advanced color grading, multi-camera editing, and enhanced effects that cater to professional needs. However, for beginners, it’s important to evaluate whether these extra features are necessary at this stage. You can always upgrade to premium software later as your skills and needs evolve.
2. Target Audience
It’s natural to be tempted by professional-level video editors, but if you’re a beginner, it’s often wiser to start with software designed for newcomers. Beginner-friendly platforms like iMovie or Filmora are intuitive and easy to navigate, featuring streamlined interfaces and helpful guides that make the learning process smoother. These tools focus on essential editing functions, allowing you to concentrate on building your skills without feeling overwhelmed by a cluttered interface or advanced features you may not yet need.
As you gain experience and confidence, you can transition to more advanced editors with steeper learning curves. This gradual approach helps you develop a solid foundation, ensuring you don’t get discouraged early in your learning process.
3. Compatibility
Compatibility is another critical consideration when selecting a video editor. Ensure that the software you choose is fully compatible with your computer’s operating system (OS). Some programs, like Final Cut Pro, are exclusive to macOS, while others, such as Windows Movie Maker, are designed for Windows users. Cross-platform editors like DaVinci Resolve or Adobe Premiere Pro can run on both macOS and Windows, offering more flexibility.
Additionally, check your computer’s hardware specifications to ensure it can handle the software you choose. Advanced editors with high processing demands may require a powerful computer with ample RAM, storage, and a capable graphics card to run smoothly. If your hardware is more basic, consider lightweight options optimized for lower-performance machines.
4. Features
The features offered by a video editor should align with the types of videos you want to create. Take some time to think about your creative goals and the tools you’ll need to achieve them. For instance, if you’re planning to create YouTube content, look for software that provides user-friendly trimming, transitions, text overlays, and export options optimized for online platforms.
If your focus is on storytelling or short films, prioritize features like color grading, multi-track editing, and advanced audio tools. For social media videos, you might benefit from templates, quick export options, and built-in aspect ratio settings for platforms like Instagram or TikTok. The key is to select software that meets your immediate needs while offering room for growth as your skills advance.
By keeping these factors in mind, you’ll be able to choose a video editing software that matches your current skill level, hardware capabilities, and creative aspirations. The right video editor not only simplifies the learning process but also empowers you to bring your vision to life with confidence and efficiency.
Video Editing Tutorial: Editing Basics
Trimming
Trimming is one of the most fundamental video editing techniques. It allows you to modify the start and end points of a video clip, helping you cut away unnecessary footage. By using a trimming tool, you can precisely remove irrelevant moments at the beginning or end of a clip, ensuring that only the most relevant parts are included in your final video. This process not only refines your clips but also gives you full control over the video’s duration, ensuring it aligns perfectly with your narrative. Whether you’re removing an awkward intro or shortening an extended conclusion, trimming enables a tighter, more engaging video.
Transitions
Transitions are essential for ensuring smooth visual continuity between clips. They help you move seamlessly from one scene to another, making the shift less jarring for viewers. Most video editing software offers a wide range of transitions, such as cross-fades, wipes, dissolves, and jump cuts. Each transition type has its own unique purpose: for example, a fade might be used to indicate the passage of time, while a wipe adds a dynamic and visually engaging effect. These transitions enhance the flow of your video, making it more polished and professional. By experimenting with different types of transitions, you can create a cohesive visual experience for your audience.
Music & Sound Effects
Music and sound effects are powerful tools in video editing, helping to set the tone, enhance specific moments, and elevate the overall production quality of your video. Many video editing platforms come with built-in libraries of music tracks and sound effects, allowing you to easily browse and incorporate them into your project. The right background music can evoke emotion, while well-timed sound effects can emphasize key moments, such as actions or dramatic pauses. By strategically using audio, you can further immerse your audience in the visual experience, reinforcing your storytelling.
Voice-over
A voice-over is an additional audio track that involves someone speaking over the video, typically used to provide context, narration, or commentary. It is usually recorded separately from the video and synced with the relevant footage during post-production. Voice-overs are commonly used in documentaries, tutorials, or promotional videos to provide a clearer explanation of the visuals, share personal stories, or guide the viewer through the content. Adding a voice-over is a great way to engage your audience, giving your video a professional touch while helping to communicate your message effectively.
Audio Editing
Effective audio editing is crucial for creating high-quality videos. It involves fine-tuning your sound to eliminate background noise, balance audio levels, and improve the clarity of your audio. This can include removing distractions such as hums or clicks, adjusting volume levels to ensure consistent sound, and ensuring that dialogue or sound effects are clear and audible. Audio editing also involves techniques like removing echo or reverb to improve the overall sound quality of the video. By paying attention to the audio elements of your video, you can create a more immersive experience that complements the visuals and enhances the message you’re trying to convey.
Color Correction and Grading
Color correction and grading are essential processes for enhancing the visual quality of your video. While they are related, they serve different purposes:
- Color correction focuses on fixing any color imbalances in your footage. This includes adjusting settings like exposure, saturation, white balance, and contrast to ensure the colors in your video appear natural and consistent. Color correction helps you achieve a uniform look throughout your video, particularly if you’ve used footage from multiple sources with different color tones.
- Color grading, on the other hand, is a more creative process. After color correction, you can use color grading to set the mood or style of your video. You can alter the color temperature, apply specific color effects, or create dramatic looks to match the tone of your project. Whether you want a warm, nostalgic feel or a cool, futuristic look, color grading allows you to add a unique visual identity to your video.
Adding Text and Lower Thirds
Text and lower thirds are important for adding context, information, or calls to action (CTAs) in your video. You can use text to highlight key points, introduce characters, or display important messages. Lower thirds, a specific type of text graphic, are often placed in the lower portion of the screen and are commonly used to introduce speakers or provide additional context. Customizing the size, font, color, and placement of text gives you full creative control over the appearance of these elements. By carefully designing your text and lower thirds, you can enhance your video’s storytelling and keep your audience engaged.
Effects
Special effects can add an exciting dynamic to your video, making it visually captivating. Video editors offer a wide range of effects, from simple adjustments like stabilizing shaky footage to more creative choices like slow-motion or time-lapse. These effects are often used to highlight important moments, create dramatic emphasis, or add an artistic touch to your project. Whether you’re aiming for a smooth and polished look or a stylized, visually striking presentation, special effects can help transform the overall feel of your video, adding depth and intrigue.
Captions and Subtitles
Adding captions or subtitles to your video not only makes it accessible to a broader audience but can also improve your video’s SEO ranking. Captions are especially important for viewers who are deaf or hard of hearing, as they provide a text-based version of the audio. Subtitles, while similar, are typically used to translate spoken dialogue into different languages. Here’s the key difference between the two:
- Captions provide a complete text representation of all audio in the video, including non-verbal sounds and sound effects.
- Subtitles focus solely on spoken dialogue, which may be translated into various languages.
You can create captions or subtitles by generating a transcript of the video’s audio. Many video editing programs can automatically generate this transcript, or you can use third-party tools. There are two ways to include them in your video:
- Open captions are embedded directly into the video, making them permanently visible.
- Closed captions are stored as a separate file, allowing viewers to toggle them on or off as desired.
Exporting and Formats
The final step in the video editing process is exporting your project. When exporting your video, it’s important to choose the right format to maintain the best possible quality. For the highest-quality output, it’s recommended to export in a lossless, uncompressed format to avoid compromising the visual and audio integrity of your project. Common formats include MP4, MOV, and AVI, which offer excellent compatibility with most platforms.
For more advanced exporting options, software like Adobe Media Encoder or Apple Compressor can help you fine-tune your settings, ensuring that your video’s quality is preserved while optimizing it for specific platforms. Whether you’re uploading to YouTube, Vimeo, or social media, exporting your video correctly ensures that it looks and sounds as intended when viewed by your audience.
As you continue your video editing journey, keep exploring new techniques, and don’t hesitate to experiment with advanced tools. By refining your editing skills and applying these fundamental concepts, you’ll be able to produce high-quality, engaging videos that capture your audience’s attention.
Riverside Video Editor Tutorial for Beginners
If you’re just starting out in video editing and aren’t quite ready to dive into a full-scale editing suite, Riverside provides a simplified, user-friendly option. Riverside offers a more streamlined approach to video editing, making it accessible for both beginners and professionals. Rather than having to download and use multiple pieces of software, you can edit your videos directly within the Riverside platform, saving you both time and effort while maintaining high-quality results.
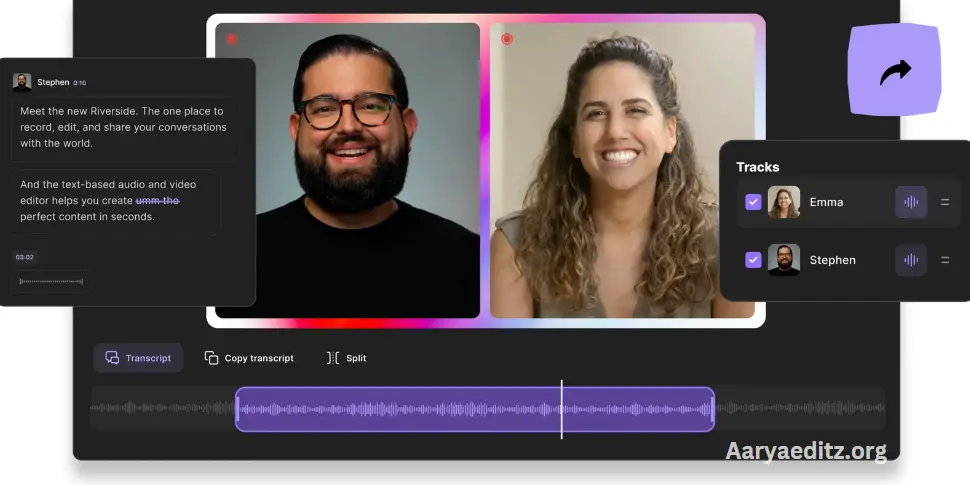
Riverside’s text-based video editor is designed for ease of use. It allows you to edit your videos in a way that’s as simple as editing a text document. This innovative feature is particularly valuable for beginners who may find traditional video editing software overwhelming. The editing tool is fully integrated with AI-generated transcriptions, which means that when you delete text in the transcript, the corresponding video and audio are also removed from your recording. This makes navigating through your footage extremely straightforward. You can search for specific phrases, eliminating the need to rewatch the entire video to locate particular moments, thus optimizing your workflow.
Once you’ve made your initial cuts, Riverside makes it easy to enhance your video. You can add captions with full customization options for style, font, and placement, ensuring your video aligns with your branding or personal preferences. The platform also allows you to incorporate your logo or custom background for a personalized touch. Moreover, Riverside’s automated audio fine-tuning tools help improve the sound quality of your video, offering features like automatic silence removal, background noise reduction, and audio normalization. These tools help you enhance your audio without needing advanced editing skills, making it perfect for beginners who want professional-sounding videos.
Riverside is also excellent for maximizing the potential of your content across multiple platforms. The Magic Clips tool is a standout feature, enabling you to create multiple short-form videos from a single long-form recording. This tool is ideal for repurposing your content to reach wider audiences and drive traffic back to your original video. Magic Clips uses AI technology to automatically detect key moments in your video, converting them into shareable, bite-sized clips. Whether you want to post these clips directly or further edit them, Riverside offers the flexibility to fine-tune your content, ensuring it works perfectly for social media platforms.
Key Features
- Text-based video editing for precise, quick cuts—editing your video is as easy as editing a transcript.
- Highly accurate AI transcriptions that support over 100 languages, making it simple to edit and navigate your footage.
- Effortless navigation via transcription, so you don’t need to watch the entire video to find specific moments.
- Magic Clip creator to transform long-form content into short, shareable videos for social media, increasing your reach.
- Customizable video layout, background, and branding options, including the ability to add your own logo.
- Automated audio fine-tuning tools that help with background noise removal and audio normalization, ensuring clear sound.
- AI-powered transitions with Speaker View, automatically switching between participants just before they speak to create seamless edits.
With these features, Riverside is an excellent tool for beginners who want to simplify the editing process without sacrificing quality. It allows you to create polished, professional videos with minimal effort and no need for complex software.
Tips for Improving Your Video Editing Skills
- Practice, Practice, Practice: The more you edit, the better you’ll become. To refine your skills, try editing a variety of videos and explore different techniques.
- Learn from Others: Watch tutorials from experienced editors, analyze professional videos to understand their editing choices, and join video editing communities to exchange tips and ideas.
- Keep It Simple: As a beginner, it’s important not to overwhelm yourself with advanced effects and techniques. Start with simple edits, and gradually build your skills as you become more comfortable with the software.
- Stay Organized: Keep your footage and assets organized with folders and labels. This organization will help save time and reduce frustration during the editing process.
By using Riverside, beginners can quickly get up to speed and start editing like a pro. With its intuitive, AI-powered tools and simple interface, it’s a great platform for creators who want to streamline their workflow without sacrificing the quality of their content. Whether you’re editing long-form videos or creating short social media clips, Riverside offers everything you need to succeed in video editing.
Frequently Asked Questions
What is the best video editing software for beginners?
When choosing the best video editing software for beginners, it’s important to consider your specific needs and budget. There are several excellent options that offer intuitive interfaces and user-friendly features to help you get started. For Mac users, iMovie is a great choice due to its simplicity and range of basic editing tools. Windows Video Editor is a good option for Windows users, providing straightforward editing features. Additionally, DaVinci Resolve is another excellent choice, offering a robust free version with advanced features that make it suitable for both beginners and those looking to upgrade their skills. These editors provide a solid foundation for anyone new to video editing.
Do I need to buy expensive software to start editing videos?
No, you don’t need to invest in expensive software when starting your video editing journey. There are many free video editing tools available that provide excellent features for beginners. Tools like HitFilm Express, Lightworks, and DaVinci Resolve offer powerful editing capabilities at no cost. These programs can help you learn the fundamentals of video editing without breaking the bank. As your skills develop and your editing needs become more complex, you can consider upgrading to premium software like Adobe Premiere Pro or Final Cut Pro, which offer more advanced features for professional-level editing.
How long does it take to learn video editing?
The time required to learn video editing varies based on several factors, such as your goals, the complexity of the software, and how much time you dedicate to practicing. For beginners, mastering basic edits—such as trimming clips, adding transitions, and adjusting audio—can take just a few hours to a few days. However, more advanced techniques, such as color grading or creating motion graphics, can take weeks or even months to fully grasp. It’s essential to be patient and consistent in your practice as you gradually progress from simple tasks to more complex editing skills.
What is the difference between a trim and a cut in video editing?
In video editing, trimming refers specifically to adjusting the start and end points of a clip, allowing you to remove unwanted portions at the beginning or end of a video. This is a simple way to refine your footage and control its duration. A cut, on the other hand, is a more general term that refers to separating or removing specific parts of a clip. A cut can be made anywhere within the clip—whether at the start, end, or in the middle—and is used to rearrange, shorten, or alter the sequence of your video.
Do I need a powerful computer to edit videos?
While having a high-performance computer can significantly speed up the video editing process, it is not absolutely necessary for beginners. For basic video editing tasks, a mid-range computer with at least 8GB of RAM and a decent processor should suffice. However, if you plan to work with high-definition or 4K video, apply heavy effects, or create professional-grade content, investing in a more powerful computer with a strong GPU will enhance your editing experience. For advanced users, a dedicated editing workstation can offer improved performance, especially for handling large projects.
Can I add music and sound effects to my video?
Yes, incorporating music and sound effects is a crucial part of video editing, as they can greatly enhance the mood and atmosphere of your video. Most video editing software provides a library of royalty-free music and sound effects that you can freely use in your projects. Alternatively, you can upload your own music or sound files. Just be mindful of copyright laws and ensure that you have the necessary rights or permissions to use any third-party music or sound effects in your video. Proper licensing can help you avoid potential legal issues.
How do I add captions or subtitles to my video?
Adding captions or subtitles is a great way to improve accessibility and expand your audience. To add captions or subtitles, you can use transcription services or editing software that automatically generates captions based on the audio of your video. You can also manually create captions by typing out the dialogue and syncing it with the video. Some advanced editing programs, such as Adobe Premiere Pro and DaVinci Resolve, include tools for creating, editing, and customizing captions directly within the software. These tools allow you to control the font, timing, and appearance of the text, ensuring a professional result.
Should I learn color grading and effects as a beginner?
Color grading and adding special effects are essential techniques in advanced video editing, but they may not be necessary for beginners. If you’re just starting out, it’s best to focus on mastering the fundamentals first, such as trimming clips, adding transitions, adjusting audio, and learning basic sequencing. Once you’re comfortable with these foundational skills, you can gradually begin exploring color grading and special effects. These creative elements can add a professional touch to your videos, but they require more time and practice to master. Start with the basics, and once you feel confident, delve into the world of color correction and visual effects.
Conclusion
Video editing is an invaluable skill that can enhance your ability to create compelling content, whether you’re working on personal projects or professional productions. Although it may seem intimidating at first, with the right tools and consistent practice, anyone can learn the basics and gradually master more advanced techniques. Starting with user-friendly software will provide you with a solid foundation, and focusing on core skills like trimming, adding transitions, and adjusting audio will help you build confidence. As you gain experience, you can start experimenting with more complex features like color grading, special effects, and captions. The key to success in video editing is persistence—so keep practicing, and you’ll see your skills improve over time.