

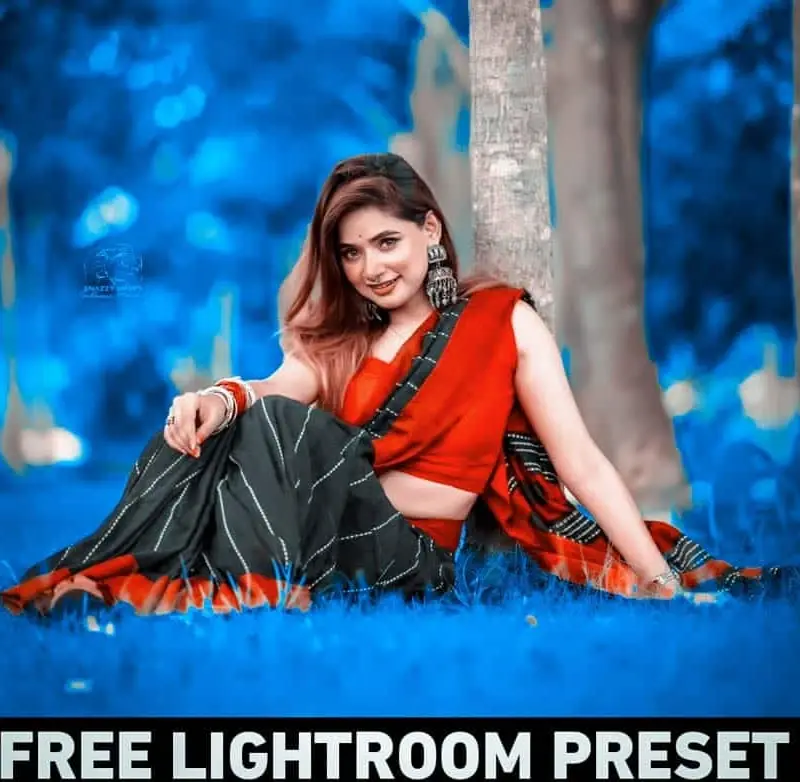
Today, I’m excited to share a set of Classic Blur Lightroom Presets with you. Over the years, we’ve received numerous requests for high-quality Lightroom presets that can easily enhance your photos. I’m thrilled to bring you an amazing one today that will elevate your editing game and give your photos a professional touch. With just a single click, this preset allows you to create a beautifully blurred blue background, transforming your photos with ease and giving them a soft, dreamy vibe. The simplicity of the preset combined with its stunning results makes it a must-have for photographers and editing enthusiasts alike.
Our team is dedicated to offering only the highest-quality presets available, and the Classic Blur Lightroom Preset is no exception. Whether you’re a beginner or a seasoned pro, this preset can bring a touch of sophistication to your images in no time. And the best part? Despite the premium quality of these presets, they’re completely free to download and use on your mobile device. No need for expensive software or complicated tools—this preset delivers professional results directly to your mobile Lightroom app. Let’s dive in and explore how to get the most out of this free preset for stunning photo edits.
Introduction
With Lightroom’s powerful editing capabilities, enhancing your images has never been easier. Whether you’re an amateur photographer, a social media influencer, or simply someone who enjoys taking photos in their spare time, Lightroom presets offer a quick way to achieve beautiful edits without the need for hours of detailed adjustments. The Classic Blur Lightroom Preset is designed to simplify the editing process by automatically applying a soft, blurred blue background to your photos, giving them a polished, dreamy look in an instant. By using this preset, you’ll be able to create stunning visuals that stand out on social media, in portfolios, or in any personal collection.
The beauty of Lightroom presets is in their simplicity. Instead of spending time tweaking settings for each photo, you can apply the preset with just one click and see the transformation right away. It’s perfect for anyone who wants to create a signature style without becoming bogged down in the technicalities of editing. Whether you’re working with portraits, landscapes, or product photos, this preset is versatile enough to enhance various types of photography.
Content Quality
When it comes to Lightroom presets, quality is key, and we’re proud to say that the Classic Blur Lightroom Preset is crafted to meet the highest standards. The soft blue hue it applies to the background complements a wide range of subjects, making it ideal for portraits, outdoor scenes, and any other image where you want to emphasize the subject while creating a serene, blurred background. This preset ensures that your photos look refined and professional, all while saving you time. By automating the process of background blurring and adding a delicate tint, it allows you to focus more on the composition of your shots instead of spending time on manual adjustments.
Another great benefit of the Classic Blur Lightroom Preset is its ease of use. For both beginners and advanced photographers, presets are a game-changer, offering an effortless way to enhance photos. The power of this preset lies in its simplicity—by applying it, you instantly achieve a high-quality result with a professional feel. The fine-tuned blurring effect enhances the subject without overwhelming the image, creating a striking contrast that draws attention exactly where it’s needed.
Even better, the preset works seamlessly on both desktop and mobile Lightroom applications. This means that no matter where you’re editing—whether on your computer or on the go with your mobile device—you can quickly and easily use the preset to create high-quality images. It’s an essential tool for photographers who need to edit their photos quickly and efficiently, making it an ideal companion for those who create content for social media, blogs, or personal portfolios.
SEO Optimization
If you’re wondering how to enhance your photos and elevate your editing skills, this Classic Blur Lightroom Preset is the perfect tool to start with. Not only does it help you achieve professional-quality results quickly, but it also saves you time and effort, making your editing process more efficient. The simple yet powerful transformation of the blue blurred background makes your images stand out and creates a sophisticated atmosphere, whether you’re working with natural light or studio lighting.
Using Lightroom presets like the Classic Blur one can enhance your photography workflow, adding that extra touch of elegance to your images with minimal effort. The good news is that this preset is free to download, making it accessible for everyone who wants to improve their photo editing. Whether you’re an influencer, a photographer, or simply someone who enjoys sharing beautiful pictures, Lightroom presets offer a quick solution to creating cohesive, high-quality content with ease. So why not make the most of this opportunity and take your photo editing to the next level with our free Classic Blur Lightroom Preset?
By incorporating the right presets into your editing process, you can build a consistent, polished aesthetic that resonates with your audience and highlights your creative vision. Don’t hesitate to download the Classic Blur Lightroom Preset today and start editing with ease—your photos will never look the same again!
Classic Blur Lightroom Presets
Classic Blur Lightroom Presets are specialized tools that allow photographers and image editors to easily add a soft blur effect to the background of their photos while introducing a beautiful blue hue. These presets are an efficient way to enhance images quickly, adding a distinctive cinematic touch that transforms your photos into something visually striking and professional. By applying just one preset, photographers can create a harmonious contrast between the sharp subject and the smoothly blurred background, making the main focus stand out more clearly.
The magic of the Classic Blur Lightroom Presets lies in their simplicity and effectiveness. They are designed for users who want to elevate their photos without spending an excessive amount of time adjusting each element individually. The blue tone introduced by the preset offers a calming and artistic atmosphere, contributing to a polished, cohesive look across your images. Whether you’re a professional photographer, a social media influencer, or someone who simply enjoys sharing beautiful pictures, these presets provide a powerful solution for achieving high-quality results quickly and easily.
How to Download Classic Blur Lightroom Presets
Downloading the Classic Blur Lightroom Presets is a simple and efficient process that can be done in just a few steps. These presets offer an easy way to enhance your images with a soft blur effect and blue-toned background, allowing you to create a cinematic look effortlessly. Whether you’re a seasoned photographer or a social media enthusiast, using these presets can elevate your editing process and add a professional touch to your photos. To help you get started, here’s a step-by-step guide on how to download and install the Classic Blur Lightroom Presets.
Step 1: Visit the Website
The first step to downloading the Classic Blur Lightroom Presets is to find a reliable website offering them. Typically, these presets can be found on photography blogs, preset marketplaces, or dedicated download pages. Make sure the website you visit is trustworthy to avoid downloading any harmful files or unreliable content. A simple search for “Classic Blur Lightroom Presets” will lead you to various sources, some of which may offer free downloads, while others might require a small purchase.
Step 2: Locate the Download Link
Once you’re on the website, navigate to the section where the Classic Blur Lightroom Presets are available. Most websites will clearly highlight the download link or button for the preset. Look for a button labeled “Download” or “Get Preset” to begin the process. If the preset is part of a bundle or subscription service, you may need to browse through different offerings to find the specific preset you want.
Step 3: Click the Download Button
After finding the download link, click on it to start the process. Some sites may require you to sign up for an account or provide your email address to access the download. This is typically done for marketing purposes or to ensure you have access to any future updates for the preset. In some cases, the preset may be available for free, while other times, it may come with a small cost.
Download Preset
Step 4: Save the File
Once you click the download button, the preset file will be saved to your device. The file is usually downloaded as a .zip folder, which contains the Lightroom preset files you need. Depending on your browser and device, the download location may vary, but you’ll generally find the file in your Downloads folder or on your desktop.
Step 5: Extract the Files
If the preset is downloaded in a .zip format, you will need to extract the files before you can use them. Simply open the .zip folder and extract its contents to a location on your device. Inside the folder, you will find the preset files, typically in either .xmp or .lrtemplate format, which are compatible with Lightroom.
Step 6: Import the Presets into Lightroom
After extracting the preset files, the next step is to import them into Lightroom. Here’s how to do it depending on your device:
- On Desktop: Open Lightroom and navigate to the “Develop” module. On the left-hand side, locate the “Presets” panel. Right-click on the panel and select the “Import” option. A file explorer window will appear. From there, you can locate the preset files you just extracted, select them, and click “Import” to add them to Lightroom.
- On Mobile: Open the Lightroom app, and tap on the “Presets” option. Tap the three dots in the top right corner, then select “Import.” A file manager will appear, allowing you to locate and import the preset files you’ve saved.
Step 7: Apply the Classic Blur Preset
Once the Classic Blur Lightroom Preset has been successfully imported, you can start using it in your photo edits. To apply the preset, simply open a photo in Lightroom and select the preset from the list in the “Presets” panel. The Classic Blur effect will be instantly applied to your image, giving it a beautifully blurred background with a calming blue tone.
That’s it! Now you can enjoy the ease and convenience of editing with your new Classic Blur Lightroom Preset. With just a few clicks, you can transform your photos and achieve a professional, cinematic look. The process of downloading and installing Lightroom presets is quick and user-friendly, making it a perfect solution for photographers of all skill levels who want to enhance their images without spending hours on manual adjustments.
For Lightroom Desktop (Classic or CC Version)
Using Lightroom for editing photos is a straightforward yet powerful process. Whether you’re using the Lightroom Classic or Lightroom CC version, the steps to enhance your images remain user-friendly and effective. One of the most convenient features of Lightroom is the ability to use presets, which can save you a significant amount of time while achieving professional-grade results. If you’re looking to apply a Classic Blur Lightroom preset to your photo, follow these steps to seamlessly edit your image.
Open Lightroom
First, launch Adobe Lightroom on your desktop or laptop. Make sure you are using either the Lightroom Classic or Lightroom CC version, as the preset application process is similar in both versions. Lightroom Classic is ideal for professional photographers who need a desktop-centric workflow, while Lightroom CC offers a more cloud-based solution for photographers on the go.
Import Your Photo
To start, navigate to the Library module. At the bottom left corner, you’ll see an option to “Import.” Click on this button to select the photos you want to edit. Once you’ve chosen your images, click “Import” again to bring them into Lightroom for editing. Importing your photos is the first step in getting them ready for any adjustments or preset applications.
Access the Develop Module
After successfully importing your photo, switch to the Develop module by clicking “Develop” in the top right corner of the screen. The Develop module is where all the editing magic happens, from exposure adjustments to preset applications.
Locate the Presets Panel
On the left side of the Develop module, you will find the Presets panel. If it’s not immediately visible, simply click the triangle next to “Presets” to open it. The Presets panel is where you’ll access all your preset settings, including the Classic Blur Lightroom preset you want to apply.
Import the Preset (if you haven’t already)
If you haven’t imported the preset yet, right-click anywhere within the Presets panel and select “Import.” A file explorer window will appear, allowing you to navigate to the folder where your preset files are saved. These preset files are typically in either .xmp or .lrtemplate format. Select the preset files you want to use and click “Import” to add them to Lightroom.
Apply the Preset
Once your presets are imported, you can easily apply them to your photo. Browse through the presets listed under the Presets panel and click on the one you want to use, such as the Classic Blur Lightroom preset. Lightroom will automatically adjust the photo’s settings based on the preset you’ve selected, including changes to exposure, contrast, and color tones.
Fine-tune the Settings
After applying the preset, you may want to fine-tune the settings to match your creative vision. While the preset will provide a solid starting point, you can tweak exposure, contrast, or any other setting in the right-hand panel to make the adjustments more specific to your needs. This flexibility ensures that your photos will look exactly how you want them to.
Save the Edited Photo
Once you’re satisfied with the results, it’s time to save your edited photo. Click “File” in the top left corner and then select “Export.” Choose your preferred file format and destination to save the edited photo to your computer. Now, you have a professionally edited image, ready for sharing or further processing.
For Lightroom Mobile
If you prefer to edit on the go, Lightroom Mobile offers a similarly efficient process for importing and applying presets, making it easy to enhance your photos on your smartphone or tablet. With the mobile version of Lightroom, you can carry your presets and apply them quickly while keeping your editing workflow seamless across platforms.
Download and Install Lightroom Mobile
Before you can start using Lightroom on your mobile device, make sure you have Adobe Lightroom installed on your smartphone or tablet. Lightroom is available for free on both iOS and Android, and it allows you to sync your edits across devices, making it perfect for photographers who need to edit while away from their desktop.
Import Your Photo
After opening Lightroom Mobile, tap the “Add Photos” button to import a photo from your gallery or camera roll. Lightroom makes it easy to select and edit images right from your device.
Access the Presets
To access the presets, tap the “Presets” option located at the bottom of the editing panel. This will allow you to browse through your available presets and apply them to the imported photo.
Import the Preset (if not already imported)
If you haven’t already imported the preset, tap the three dots in the top right corner of the Presets panel. From there, choose “Import Presets” and select the preset file in .dng format that you’ve saved on your device. This will add the preset to Lightroom Mobile.
Apply the Preset
Browse through your preset options, and simply tap on the one you wish to apply to your photo. Lightroom will instantly adjust your photo based on the settings contained within the preset, creating a smooth and efficient editing process.
Adjust the Photo
If you want to make further tweaks to your photo after applying the preset, Lightroom Mobile gives you the option to adjust sliders for exposure, contrast, and other settings. These tools ensure you can perfect your edits to your liking, even on a smaller screen.
Save or Share Your Photo
Once you are happy with the edits, you can export or share the photo directly from Lightroom Mobile. Simply tap the “Share” icon in the upper-right corner to save or share your photo via email, social media, or other platforms.
With these steps, whether you’re using Lightroom on your desktop or mobile device, you’ll be able to enhance your photos quickly and professionally using the Classic Blur Lightroom preset. The process is intuitive and ensures that you can produce stunning images in a fraction of the time.
Tips for Using Lightroom Presets
Lightroom presets are an invaluable tool for photographers, offering a quick and efficient way to enhance your images. These predefined settings can help you achieve a professional look in no time, but to truly maximize their potential, it’s important to use them strategically. Whether you’re a beginner or an experienced photographer, understanding how to get the most out of Lightroom presets can elevate your editing workflow and help you produce stunning results. Here are a few key tips to make the most of your Lightroom presets.
Experiment with Multiple Presets
One of the best aspects of Lightroom presets is the wide variety of options available. Don’t be afraid to experiment with different presets until you find the one that works best for your image. Every photo is unique, and some presets may work better with certain lighting conditions, subjects, or compositions. By testing various presets, you can discover how different looks can transform your images, allowing you to achieve the desired effect for each particular shot. It’s always worth trying more than one preset to see which one complements the mood or style you’re aiming for.
Use Presets as a Starting Point
While presets can be incredibly helpful, it’s important to remember that they are only a starting point in the editing process. Applying a preset will give your photo a polished look, but each image has its own unique characteristics that may require further adjustments. After applying a preset, feel free to tweak the settings to fine-tune exposure, contrast, color balance, and other elements. This will ensure that the final image not only looks great but also reflects your personal editing style. Using presets as a base for adjustments can save time while allowing you to maintain creative control.
Organize Presets
If you use multiple presets, organizing them into folders can make your workflow much more efficient. Lightroom allows you to create folders in the Presets panel, which is especially helpful if you have a large collection. By grouping presets based on themes, such as “portrait,” “landscape,” or “black and white,” you can quickly locate the preset that best fits your photo. This organizational tip can save time and prevent frustration when working with numerous presets, ensuring that you can find the right one when you need it.
By using Lightroom presets, you can significantly speed up your editing process while maintaining a professional appearance in your photos. Whether you’re experimenting with multiple options, using presets as a foundation for customization, or keeping them organized for easy access, these strategies will help you make the most of this powerful editing tool. Presets are a valuable asset for any photographer, and with these tips, you can unlock their full potential.
Frequently Asked Questions
Classic Blur Lightroom Presets have become an essential tool for photographers who want to achieve a soft, cinematic look with minimal effort. These pre-configured settings are designed to blur the background of a photo while adding a distinctive blue tone, helping the main subject stand out with a professional, polished feel. Whether you’re a beginner looking to speed up your editing process or a seasoned photographer seeking to add an artistic flair to your images, these presets offer an efficient way to enhance your photos.
These presets are ideal for those who want to create an impressive blur effect around the subject while maintaining a sharp focus on the main object of the photo. This technique is often used to give photos a more cinematic or dreamy quality, transforming ordinary shots into visually compelling images. To help you make the most of these presets, here are answers to some of the most frequently asked questions.
What are Classic Blur Lightroom Presets?
Classic Blur Lightroom Presets are pre-configured settings designed to apply a soft blur effect to the background of a photo while introducing a blue tone. This preset works by creating a beautiful, cinematic blur that makes the subject of the photo pop. The goal is to give images a professional, artistic look with minimal effort. The soft blur effect creates a sense of depth, ensuring the subject remains the focal point while the blurred background enhances the overall composition. These presets are perfect for those looking to add an extra level of polish to their photos without having to manually adjust every setting.
Can I use Classic Blur Lightroom Presets on my phone?
Yes, you can use Classic Blur Lightroom Presets on Lightroom Mobile! The mobile version of Lightroom allows you to import and apply these presets just as you would on the desktop version. To get started, download the preset, then import it into Lightroom Mobile (typically in .dng format). Once imported, you can easily apply it to your photos directly from your phone, making it a convenient option for photographers who prefer editing on the go. The presets work seamlessly on mobile devices, enabling you to achieve professional-quality edits from anywhere.
Are Classic Blur Lightroom Presets free to download?
Some versions of the Classic Blur Lightroom Presets are available for free, while others may come with a price tag. It’s important to check the website or platform from which you’re downloading the preset to see if it’s free or paid. Many photography blogs and preset sites offer both free and premium versions of these presets. If you’re on a budget, there are likely some free options that can still deliver excellent results, but for more advanced or specialized versions, you may need to purchase them.
Can I use Classic Blur Presets for all types of photos?
While Classic Blur Lightroom Presets work exceptionally well for portraits, product photography, and outdoor shots, they may not be suitable for every type of photo. The blur effect and blue tone are most effective when the subject stands out against a softer, less-distracting background. This makes it ideal for portrait photography or images where you want to isolate the subject from the background. However, for certain types of photos, such as landscapes or architectural shots, you may need to adjust the settings or even skip the preset altogether. In these cases, experimenting with other types of presets might be a better option.
Can I create my own preset after using the Classic Blur Preset?
Yes, you can create your own custom preset after applying the Classic Blur Preset! Once you’ve applied the preset to your image and adjusted it to your liking, you can save those changes as a new preset for future use. In the Lightroom Classic version, simply go to the Develop module, click the “+” sign under the Presets panel, and select “Create Preset.” Name the preset, choose the settings you want to include, and save it for easy access during future editing sessions. This feature allows you to build a personalized preset collection tailored to your editing style.
Can I use Classic Blur Presets for social media photos?
Absolutely! Classic Blur Lightroom Presets are perfect for social media photos. The soft blur effect combined with the blue tone can create visually striking images that are sure to catch the eye of your followers on platforms like Instagram, Facebook, or Pinterest. The enhanced focus on the subject, along with the artistic blur in the background, helps your photos stand out in a crowded feed. Whether you’re sharing personal photos, influencer-style content, or professional product shots, these presets can elevate your social media presence with minimal effort.
Conclusion
Classic Blur Lightroom Presets are an incredibly versatile and powerful tool for transforming your photos with minimal effort. The soft, blurred background combined with the blue tone adds a professional and cinematic quality to your images, making them visually striking and polished. These presets are perfect for photographers at all skill levels, offering a quick and efficient way to enhance your photos. Whether you’re using Lightroom on your desktop or mobile device, you can enjoy the flexibility and convenience of applying these presets to various types of images, from portraits to social media shots.
With the ability to fine-tune the intensity of the preset and apply it across different types of photos, you can create consistent, eye-catching results every time. Classic Blur Lightroom Presets are a great way to streamline your photo-editing process, and they’re accessible to anyone looking to improve their editing workflow, regardless of their experience level.