

If you’re an active user of Instagram or Facebook, chances are you’ve come across the name Rohit Zinjurke. Renowned for his visually captivating photographs, Rohit has built a substantial following and consistently garners countless likes on his posts. His success on social media isn’t just about his photography skills—it’s also rooted in his exceptional ability to edit photos, which elevates his images to a whole new level of appeal.
Rohit Zinjurke’s photography is characterized by a distinct cinematic aesthetic that captures attention and sets his work apart from ordinary images. This unique editing style has gained immense popularity, inspiring many to emulate his approach. The great news for photography enthusiasts and aspiring content creators is that achieving a similar aesthetic is now easier than ever.
In this article, we’ll delve into Rohit Zinjurke’s Lightroom Presets, powerful tools that let you edit your photos to reflect his signature style with just one click. By using these presets, you can transform your ordinary snapshots into visually stunning works of art in a fraction of the time it would take to edit manually.
Whether you’re just starting with photo editing or already have some experience, these presets are designed to simplify the process. For those who may feel daunted by the technical aspects of editing or the complexities of Lightroom, don’t worry—this guide will cover every step, ensuring that even beginners can follow along with ease.
Lightroom Presets are essentially pre-designed filters that apply specific adjustments to your photos, enhancing their colors, tones, and overall composition. With Rohit Zinjurke’s presets, you’ll gain access to the tools needed to recreate the cinematic flair that defines his work. From moody shadows to vibrant highlights, these presets offer a professional-grade solution to elevate your photography effortlessly.
By the end of this guide, you’ll not only understand how to download and use Lightroom Presets but also have the ability to transform your photos into professional-looking visuals with cinematic appeal. Whether you’re aiming to improve your social media presence or simply want to explore creative photography, these presets are a game-changer. Let’s dive in and unlock the secrets to achieving stunning visuals inspired by Rohit Zinjurke’s iconic style.
Who is Rohit Zinjurke?
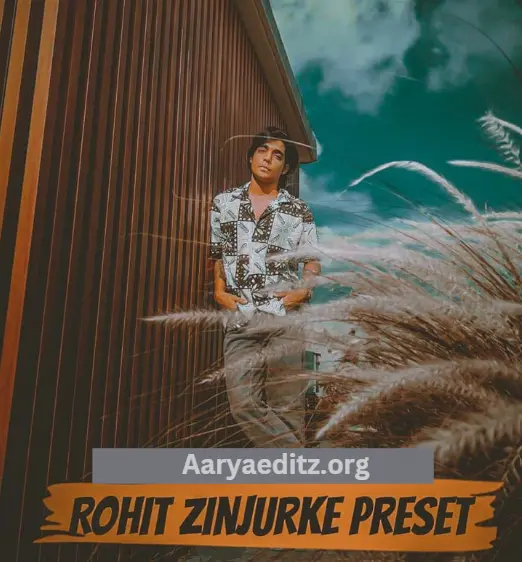
Rohit Zinjurke is a well-known Indian social media influencer, photographer, and content creator who has gained immense popularity for his remarkable photo editing skills and engaging presence on platforms such as Instagram and Facebook. With a creative eye for detail and an innate talent for photography, Rohit has captivated audiences by consistently producing visually stunning images. His work often features a cinematic and moody aesthetic that sets him apart in the world of digital photography and social media.
Rohit’s distinct editing style is one of the key elements that has earned him a significant following. By blending vibrant colors, dramatic lighting, and cinematic tones, he creates photographs that are not only eye-catching but also emotionally resonant. This unique approach has established him as a prominent figure in the Indian photography community, inspiring countless aspiring photographers and content creators who look up to his work and aim to replicate his iconic style.
A defining aspect of Rohit Zinjurke’s contribution to the photography world is his development of Lightroom presets. These presets allow others to achieve results similar to his signature editing style with minimal effort, making advanced editing techniques accessible even to beginners. His presets are widely appreciated for their ability to transform ordinary photos into professional-looking visuals, enabling users to recreate his distinctive aesthetic with just a few clicks.
Rohit’s content is incredibly diverse, ranging from landscapes and portraits to lifestyle photography. Each of his photos reflects his dedication to high-quality visuals and his creative approach to storytelling through imagery. This ability to consistently deliver aesthetically pleasing and impactful content has made him a prominent name among digital creators and photography enthusiasts.
Beyond his technical skills and artistic vision, Rohit’s work resonates deeply with his audience because of its authenticity and visual appeal. His journey as a social media influencer and photographer is a testament to his passion for his craft and his ability to adapt and innovate in a highly competitive digital space. Whether through his awe-inspiring photographs, expert editing techniques, or user-friendly presets, Rohit Zinjurke continues to inspire and empower a new generation of photographers and content creators.
What is Lightroom?
Adobe Lightroom is a highly versatile and powerful photo editing software developed by Adobe, widely recognized as a top-tier tool for professional photo editing, color correction, and image enhancement. Designed to cater to both novice and experienced photographers, Lightroom offers a comprehensive suite of features that make it an essential tool for anyone aiming to improve the quality and aesthetics of their photos. It is available across various platforms, including mobile devices and desktop systems, making it accessible to users with different needs and preferences.
What sets Adobe Lightroom apart from other photo editing software is its combination of advanced functionality and user-friendly design. One of its standout features is the Lightroom Preset, which allows users to apply predefined adjustments to their photos instantly. These presets are a game-changer for photographers and content creators, enabling them to achieve consistent, professional-quality edits with just a single click. Whether you want to enhance colors, adjust lighting, or create a specific mood, Lightroom Presets simplify the editing process and ensure uniformity across multiple images.
In addition to presets, Lightroom provides a wide array of tools for fine-tuning images, including exposure adjustments, cropping, noise reduction, and advanced color grading. These tools allow users to make precise edits that bring out the best in their photos. The software’s intuitive interface ensures that even those new to photo editing can navigate its features with ease, while its advanced capabilities cater to professionals who require more detailed control over their edits.
Adobe Lightroom is designed for maximum accessibility, available for download on Android and iOS devices through the Google Play Store and Apple App Store. This cross-platform compatibility ensures that users can seamlessly edit their photos on the go or on a desktop, depending on their workflow preferences. The mobile version retains much of the functionality of the desktop version, making it an excellent choice for creators who need flexibility without compromising on quality.
Whether you are a hobbyist looking to enhance your photos or a professional photographer aiming for high-quality edits, Adobe Lightroom provides the tools and features necessary to achieve stunning results. Its combination of ease of use, advanced editing capabilities, and the innovative preset system has cemented its status as a favorite among photographers and content creators worldwide. By using Lightroom, you can elevate your photo editing game and produce visually striking images that stand out in a competitive digital landscape.
How to Download Rohit Zinjurke Preset?
If you’re eager to edit your photos like the renowned social media influencer and photographer Rohit Zinjurke, using his custom Lightroom Presets is an excellent way to achieve that signature cinematic and vibrant style with minimal effort. His presets are designed to help you enhance your images quickly, giving them the professional, high-quality look that he is famous for. Here’s a step-by-step guide to help you download and install Rohit Zinjurke’s Lightroom Presets with ease:
Step 1: Find a Reliable Source
Before you begin downloading, it’s important to ensure you’re getting the presets from a trustworthy and reliable source. Rohit Zinjurke’s Lightroom Presets are typically shared through a few common channels:
- Official Websites: Rohit Zinjurke may offer his presets directly through an official website or an online store where you can either purchase or download them.
- Social Media Links: As an active presence on social media platforms like Instagram, YouTube, and Facebook, Rohit might share direct links to download his presets, often as part of a promotion or tutorial.
- Photography Forums or Communities: Another option is to check out photography forums or online communities where fellow creators might exchange useful editing tools, including Lightroom Presets.
Important: When downloading presets, always be cautious and avoid third-party websites that seem untrustworthy, as they may lead to unreliable links or even malicious files. Stick to official and well-known sources to ensure the safety and quality of your download.
Step 2: Download the Preset File
After identifying a reliable source, the next step is to click on the provided download link. Typically, Lightroom Presets will be available in a downloadable file format, which could either be:
- ZIP File: A compressed file containing multiple preset files.
- DNG File or XMP File: These file types are compatible with Lightroom and may be provided individually or in a batch.
Once you click the download link, your file should begin to download to your device, ready for the next steps.
Step 3: Extract the ZIP File (If Applicable)
If you downloaded a ZIP file, you’ll need to extract it in order to access the preset files inside. Most devices, both mobile and desktop, have built-in tools to unzip files:
- On mobile devices: Use a file manager app or a specialized unzip tool to extract the files.
- On desktop computers: Right-click the ZIP file and select “Extract All” to open the file and access the individual preset files.
Once extracted, you’ll have access to the Lightroom Preset files, which are now ready for import.
Step 4: Import the Preset into Lightroom
With the preset files now accessible on your device, you can move on to importing them into Lightroom. Whether you’re using Lightroom on your mobile device or desktop, the process is relatively simple:
- For Lightroom Mobile:
- Open the Adobe Lightroom app on your mobile device.
- Navigate to the “Presets” section within the app.
- Tap on the three dots or “Add Preset” button (depending on the version of Lightroom you’re using).
- Select “Import Preset” or “Import from File”.
- Browse to the preset file you downloaded, select it, and follow the on-screen instructions to add it to your Lightroom presets.
- For Lightroom Desktop (Windows or Mac):
- Open Lightroom Classic on your computer.
- On the left panel, under the “Presets” section, click the “+” icon or the “Import” option.
- Navigate to the folder where you extracted the preset files.
- Select the preset(s) you wish to import, then click “Import” to add them to Lightroom.
Step 5: Apply the Preset
Once the preset is successfully imported into Lightroom, you’re ready to start editing your photos. Simply open the photo you want to edit in Lightroom and select the preset you just added from the Presets panel. The preset will automatically apply the settings to your image, giving it the distinct, cinematic look that Rohit Zinjurke is known for. This quick application of the preset allows you to instantly transform your photo, making it more vibrant, dynamic, and visually appealing.
Step 6: Adjust (Optional)
While the preset will serve as an excellent starting point for your photo, feel free to make additional adjustments if needed. You can tweak various settings, such as exposure, contrast, saturation, and other elements, to better suit the specific lighting and mood of your image. Fine-tuning these settings will help you achieve the perfect result and ensure that your photos reflect your unique style, while still maintaining the signature look of Rohit Zinjurke’s editing techniques.
By following these simple steps, you can easily download and apply Rohit Zinjurke’s Lightroom Presets to enhance your photography and create stunning, professional-quality images in no time.
Download
How to Use Rohit Zinjurke Lightroom Preset?
Using Rohit Zinjurke’s Lightroom Preset is a simple and effective way to transform your photos into stunning visuals with just a few taps. Whether you are new to Lightroom or already have some experience, following these easy steps will help you achieve professional-quality edits with minimal effort.
First, begin by downloading and installing the Lightroom app on your mobile device. You can easily find the Lightroom app on both the Play Store (for Android users) and the App Store (for iOS users). Once the app is installed, open it and choose the photo you want to edit. Along with the photo, ensure that you have downloaded the Lightroom preset file that you want to use.
Next, within the Lightroom app, locate and select the preset that you want to apply to your image. After choosing the preset, tap the three dots icon located at the top of the app’s interface. From the dropdown menu, select the option to “Copy Settings.” This will save the preset’s adjustments, including any color corrections, tones, and other edits.
Once the settings are copied, return to the photo you wish to edit. Tap the three dots again, and this time, select “Paste” from the menu. By doing this, you will apply the preset settings directly to your photo. Your image will instantly take on the signature cinematic and vibrant look that Rohit Zinjurke is known for.
After applying the preset, you can make additional tweaks if necessary. For example, you might want to adjust exposure, contrast, saturation, or other elements to better suit the specific lighting conditions or mood of your photo. Lightroom’s intuitive editing tools make it easy to further refine your images to your liking.
By following these straightforward steps, you’ll be able to create beautifully edited photos that closely resemble Rohit Zinjurke’s iconic style. Whether you’re editing for personal use or to enhance your social media feed, these presets can save you a great deal of time and effort while ensuring professional-looking results.
If you’re looking for additional help or would like more detailed guidance on using Lightroom presets, consider watching the tutorial video provided below. Alternatively, feel free to leave a comment or reach out for more support, and I’ll gladly assist you with any questions you may have.
Lightroom Preset System Requirement
Before you start using Lightroom and applying presets, make sure your device meets the minimum system requirements for optimal performance:
- Operating System (OS): Android 6.0 (Marshmallow) or later
- RAM: 2 GB or more
- Storage: At least 1 GB of free space
- Processor: Quad-core CPU
These requirements ensure that Lightroom runs smoothly on your device, allowing you to take full advantage of the powerful editing features and apply presets with ease.
Best Features of Rohit Zinjurke Preset
Rohit Zinjurke’s Lightroom Preset comes with a range of advanced features designed to elevate your photo editing experience and deliver professional-grade results. Whether you’re a beginner or an experienced photographer, these features allow you to easily transform your images and achieve that signature cinematic style. Here are the standout features of the Rohit Zinjurke Preset:
One of the key highlights of this preset is its advanced color grading, which enables professional-level adjustments to your photos. This feature allows you to manipulate and enhance colors in a way that adds depth, vibrancy, and mood to your images, creating a visually striking effect. The precise color grading in this preset ensures your photos will have a polished and sophisticated look, similar to Rohit Zinjurke’s signature style.
In addition, the Rohit Zinjurke Preset is fully compatible with both RAW and JPEG files, offering versatility to photographers using different formats. Whether you’re working with high-quality RAW images or standard JPEGs, you can apply the preset and achieve consistent results. This compatibility ensures that no matter what kind of image you’re editing, the preset can enhance its visual quality without compromising the details.
The customizable presets feature is another great benefit of using this editing tool. While the preset comes with a unique and predefined editing style, it can also be adjusted to suit your personal preferences. You can easily tweak the settings to match your specific aesthetic or adapt to the lighting and mood of different images, allowing you to make the most of the preset while still retaining control over your edits.
For photographers working with high-dynamic-range (HDR) images, the Rohit Zinjurke Preset supports HDR merge, which allows you to create images with enhanced dynamic range. This feature ensures that your images retain fine details in both the highlights and shadows, giving your photos more depth and contrast. Whether you’re working with landscapes or high-contrast scenes, this feature helps bring out the full potential of your shots.
Another impressive aspect of the Rohit Zinjurke Preset is that it is optimized for high-resolution images. This means that no matter how detailed or large your image is, the preset will maintain crisp, clear details, making sure your photos look sharp and high-quality. Whether you’re editing portraits or wide-angle shots, the preset enhances every detail without losing resolution.
One of the most appealing aspects of the Rohit Zinjurke Preset is that it is free to download. This means you can access powerful photo-editing tools and professional-quality features without any cost. It’s an excellent choice for photographers and content creators looking for an affordable way to achieve stunning results without spending money on expensive software or presets.
Lastly, the preset provides bug-free performance, ensuring a smooth and seamless editing experience. With no technical glitches or errors, you can focus entirely on enhancing your photos without interruptions, giving you a hassle-free editing workflow.
By offering these features, the Rohit Zinjurke Preset makes professional photo editing more accessible and efficient, allowing users to enhance their images with ease while achieving stunning, cinematic results. Whether you’re a beginner or an experienced photographer, this preset can help you take your photography to the next level.
Frequently Asked Questions(FAQs)
What are Rohit Zinjurke Lightroom Presets?
Rohit Zinjurke Lightroom Presets are specially designed, pre-configured editing settings that allow users to replicate the signature vibrant, cinematic style that Rohit Zinjurke is famous for. These presets apply a series of color grading, tone adjustments, and other effects automatically to your photos with a single click, streamlining the editing process and helping you achieve professional-quality results effortlessly. Whether you’re working on portraits, landscapes, or lifestyle shots, these presets can enhance the mood and visual appeal of your photos in no time.
How do I download Rohit Zinjurke Lightroom Presets?
To download Rohit Zinjurke’s Lightroom Presets, you should visit trusted sources such as his official website, social media profiles (Instagram, YouTube, etc.), or other reputable photography communities. It’s essential to ensure that you’re downloading from a secure and reliable source to avoid any risks such as malware or unreliable links. Always verify that the website or community offering the presets is credible to guarantee the safety of your download.
Are these Lightroom presets free?
While some of Rohit Zinjurke’s Lightroom Presets may be available for free, others may come with a cost. Certain presets may be offered as part of a premium pack, requiring a one-time purchase or a subscription. It is always recommended to check the download page for accurate information regarding the price and availability of each preset. This way, you can ensure that you know what to expect and avoid any surprises.
How do I install the presets in Lightroom?
After downloading the preset file, which could be in ZIP, DNG, or XMP format, you will need to extract it (if it’s in a ZIP file). Once the preset file is ready, you can follow the steps to import it into Lightroom. On mobile devices, you can use the “Import Preset” option to add the preset to your Lightroom app. On desktop Lightroom (whether Windows or Mac), simply click the “+” icon located in the Presets panel and choose the preset you want to import. This straightforward process ensures that you can begin editing your photos quickly with your newly added preset.
Can I use these presets on both mobile and desktop Lightroom?
Yes, Rohit Zinjurke’s Lightroom Presets are compatible with both Lightroom Mobile and Lightroom Classic (desktop). This allows for seamless integration and flexibility, whether you’re editing photos on your mobile device or using a desktop. However, it is important to ensure that you’re using the correct preset file format—either DNG or XMP—as these formats are supported by both mobile and desktop versions of Lightroom.
Will these presets work on all photos?
While Rohit Zinjurke’s presets are designed to enhance a wide range of photos, the results may vary depending on specific factors like lighting, composition, and the type of photo being edited. Some adjustments may be necessary to fine-tune the preset’s application to your individual image. Lightroom’s powerful editing tools allow you to modify the settings after applying the preset, giving you full control over the final look. This ensures that you can tailor the preset to fit the unique characteristics of each photo.
Can I customize the preset after applying it?
Absolutely! One of the most appealing features of Lightroom Presets is that they serve as a starting point for your edits. Once you’ve applied the preset to your image, you can adjust various settings such as exposure, contrast, saturation, shadows, highlights, and more to suit your vision. This customization feature allows you to maintain the essence of the preset while adding your personal touch and fine-tuning the photo for the perfect result.
Are these presets compatible with RAW and JPEG images?
Yes, Rohit Zinjurke’s Lightroom Presets are fully compatible with both RAW and JPEG image formats. Whether you are working with high-quality, detailed RAW images or standard JPEG photos, these presets will enhance the color grading and overall look of your photos. This makes them versatile and suitable for various types of images, from professional photography sessions to casual snapshots.
Conclusion
Rohit Zinjurke Lightroom Presets provide an invaluable tool for photographers and content creators who want to quickly and efficiently replicate his signature cinematic editing style. By offering powerful features like advanced color grading, tone adjustments, and HDR merge capabilities, these presets allow you to enhance your photos in a matter of seconds, achieving vibrant colors, stunning contrast, and a professional look that grabs attention.
Whether you are a beginner just starting with photo editing or an experienced photographer looking to speed up your editing workflow, these presets are an excellent choice. With their compatibility for both RAW and JPEG files, the presets are versatile and adaptable to various types of images, ensuring high-quality results for every photo.
By downloading and applying these presets, you can instantly elevate the visual quality of your photos and make them stand out, whether on social media, personal projects, or professional portfolios. Rohit Zinjurke’s Lightroom Presets offer a simple yet powerful way to enhance your editing skills and bring a creative, cinematic flair to your images with minimal effort.